Mounting Options: Frame, Profile and Rail
Rails vary across plants built in different decades. Confirming the mounting interface early prevents a comfortable pilot from becoming a field surprise.
Key takeaways
- The enclosure is designed to attach in three ways: to the module frame, to a standard aluminum profile, or directly to the module mounting rail.
- For each row, record the mounting torque, connector seating, device address, firmware version, radio signal quality, initial state of charge and the electrical readings taken before the s...
- Keep an electrical safety certificate, environmental rating, mechanical load report and installation instructions in the submission pack.
Three interfaces, one product
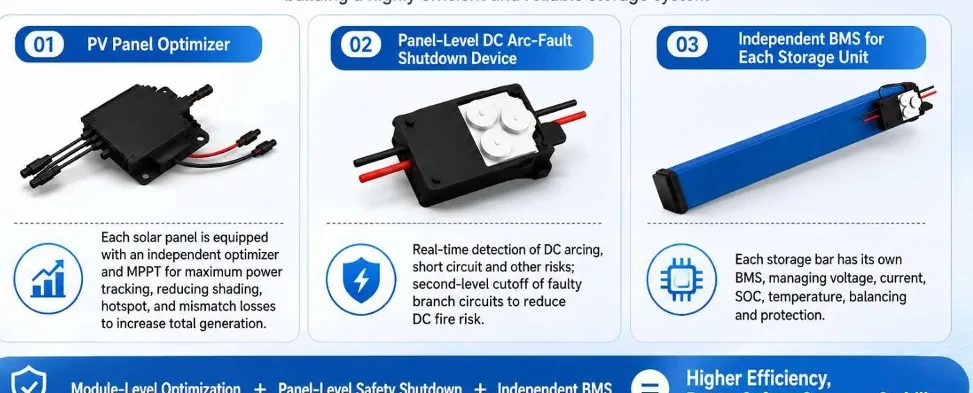
The enclosure is designed to attach in three ways: to the module frame, to a standard aluminum profile, or directly to the module mounting rail. The three options exist because real plants differ. A greenfield array with modern clamps looks nothing like a fifteen-year-old site with hand-cut profiles and non-standard spacing.
Load paths
Whatever the interface, the device's weight is carried by existing structure rather than by the module glass. Wind uplift and vibration are also transmitted into the rail, which is why rack load-bearing and wind-load documentation is a normal part of a technical submission. On sites with long unsupported spans, additional rail reinforcement may be the right engineering answer.
Ventilation and thermal effects
Mounting beneath a module changes the local thermal environment: the module back sheet and the enclosure warm each other slightly. That is why back-sheet temperature-rise testing and hot-spot assessment are part of a credible product file. At the same time, the enclosure shades part of the rail and adds mass that damps vibration, so the net effect on the module is a matter for measurement rather than assumption.
What to inspect on a site visit
Measure rail type and spacing, clamp positions, existing corrosion, connector condition and the clearance available beneath the module. Photograph a representative row and note any deviations. This half-day inspection is the cheapest risk reduction available in the entire project, and it produces the compatibility statement the buyer will ask for anyway.
Commissioning checklist for a row
For each row, record the mounting torque, connector seating, device address, firmware version, radio signal quality, initial state of charge and the electrical readings taken before the section returned to service. That list looks long, but it is collected in a few minutes and it becomes the baseline for every later comparison and warranty claim.
What to inspect after one year
Revisit a sample of rows after a full seasonal cycle: check connector condition, enclosure seals, mounting hardware and dust accumulation, and compare measured generation against the same months of the previous year. Finding a degradation trend in year one is far cheaper than discovering it after the warranty period closes.
Ground-mount versus rooftop differences
Ground-mounted arrays usually offer easier access, more clearance and space for handling equipment. Rooftops constrain access, limit tool use and often require fall protection, which changes both labor rates and the practical size of a daily work section. Estimating these two environments with the same productivity assumption is one of the most common causes of cost overrun in retrofit contracts.
Standards and paperwork
Keep an electrical safety certificate, environmental rating, mechanical load report and installation instructions in the submission pack. Buyers rarely accept a mounting method on the strength of a photograph; a short document set makes the mounting decision reviewable by their own engineers, which shortens approval.
Want this analyzed for your plant?
Send your array data and we will return a technical view within one business day.
Literature search entries on Technical Specifications (Full Datasheet)
The entries below open literature search results rather than single papers, so the reading list can be filtered by date, citation count and full-text availability at the source. 24 queries across five indexes, grouped by source.
Google Scholar1
Semantic Scholar1
Baidu Scholar1
IEEE Xplore1
ScienceDirect1
OpenAlex19
- IEC 62109 safety standard photovoltaic inverter
- DC optimizer specification PV module
- IP65 enclosure photovoltaic electronics
- battery cycle life LFP 6000
- MC4 connector photovoltaic system standard
- photovoltaic connector standards
- battery temperature range specifications
- converter efficiency measurement method
- photovoltaic system EMC standards
- inverter power rating testing
- IP65 rating solar inverter
- IEC 62109 photovoltaic inverter
- UL 1741 inverter interconnection
- lithium battery cycle life testing
- MC4 connector compatibility
- photovoltaic DC cable standard
- inverter restart time standard
- operating temperature range solar electronics
- CE certification PV equipment
Take the Numbers With You
The brochure covers the storage rod, the five safety layers, the gateway and the cloud platform. Download it, or send us your site conditions for a proposal within one business day.